
Device Reservation
Overview:
Device Reservation enables you to securely book and allocate a specific physical or virtual device for exclusive use during your testing sessions. Once a device is reserved, it is locked for your use, ensuring uninterrupted access and preventing conflicts with other users.
With built-in scheduling capabilities, device reservation allows you to plan and reserve devices in advance, guaranteeing availability when you need it most. Reservations are time-bound, helping teams manage resources efficiently while maintaining smooth testing workflows.
In cloud-based testing environments, device reservation also supports remote access to real and virtual devices, empowering teams to execute reliable, consistent, and conflict-free testing across platforms. This feature enhances productivity, optimizes device utilization, and ensures a seamless testing experience.
Step 1: Log in to your TestGrid account.
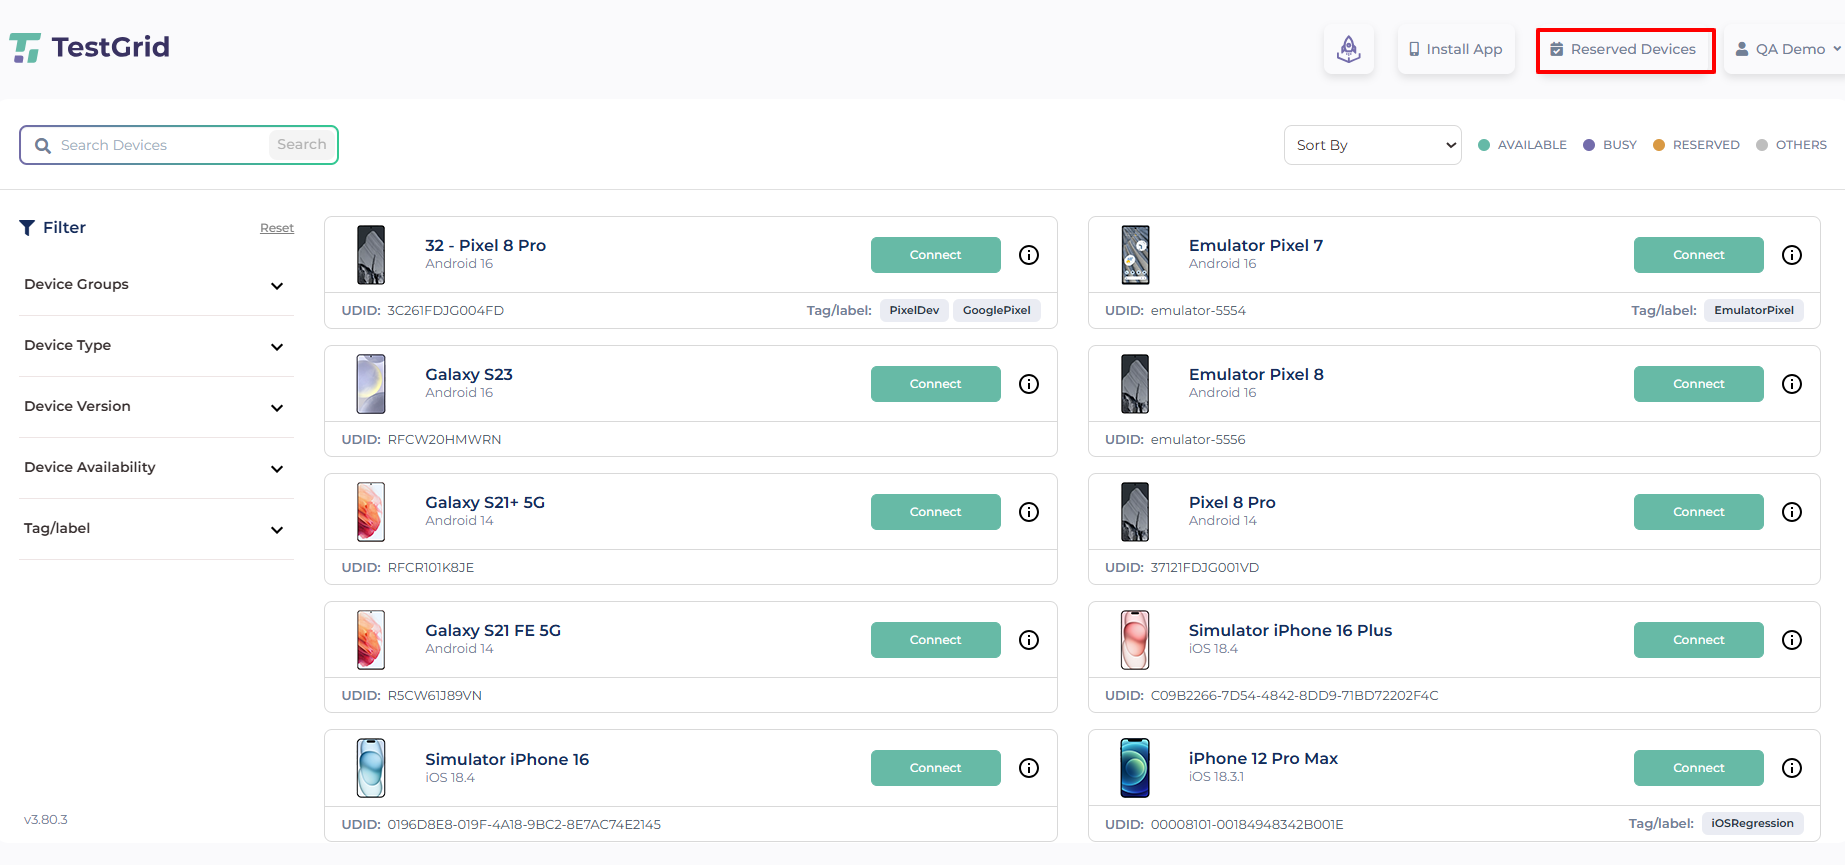
- After logging in to the TestGrid platform with valid credentials, navigate to the Real Device Cloud from the left-side menu. Once selected, you will see all devices allocated to your account. Click the “i” icon on any device to view its detailed information.
Step 2: After clicking the ‘i’ button, the “Reserve” button will appear. Clicking this button will open the reserve window.
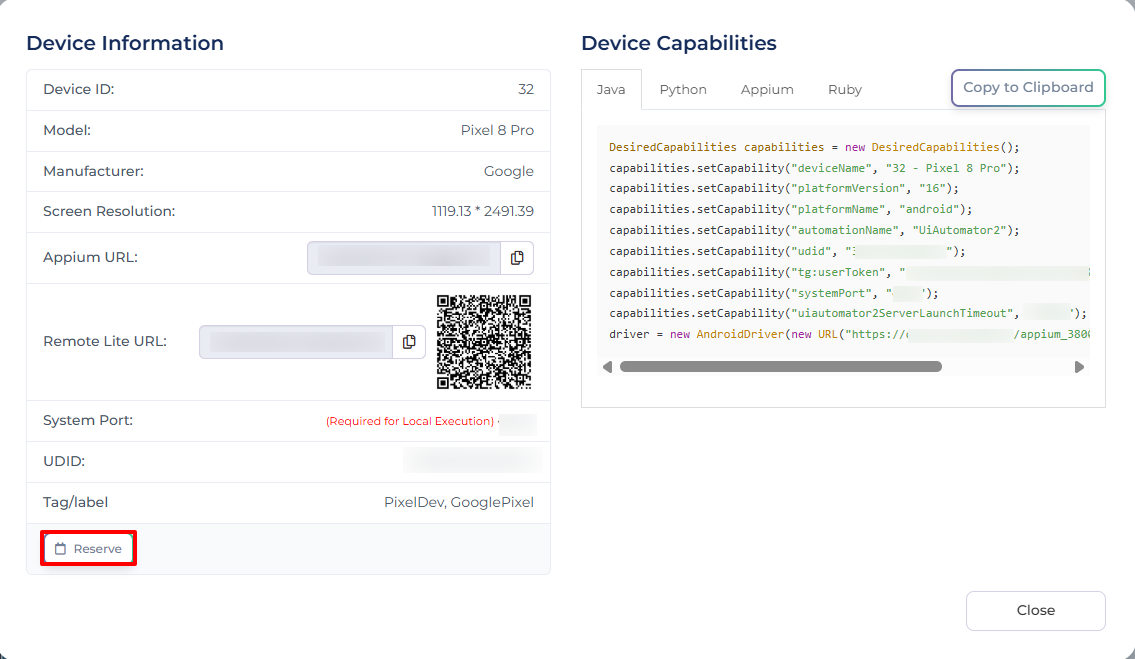
Step 3: Once the reserve tab is clicked, this window will appear to reserve the device for the duration that the user requires.
- Once you fill in the appropriate details in the required field, click on the reserve button.

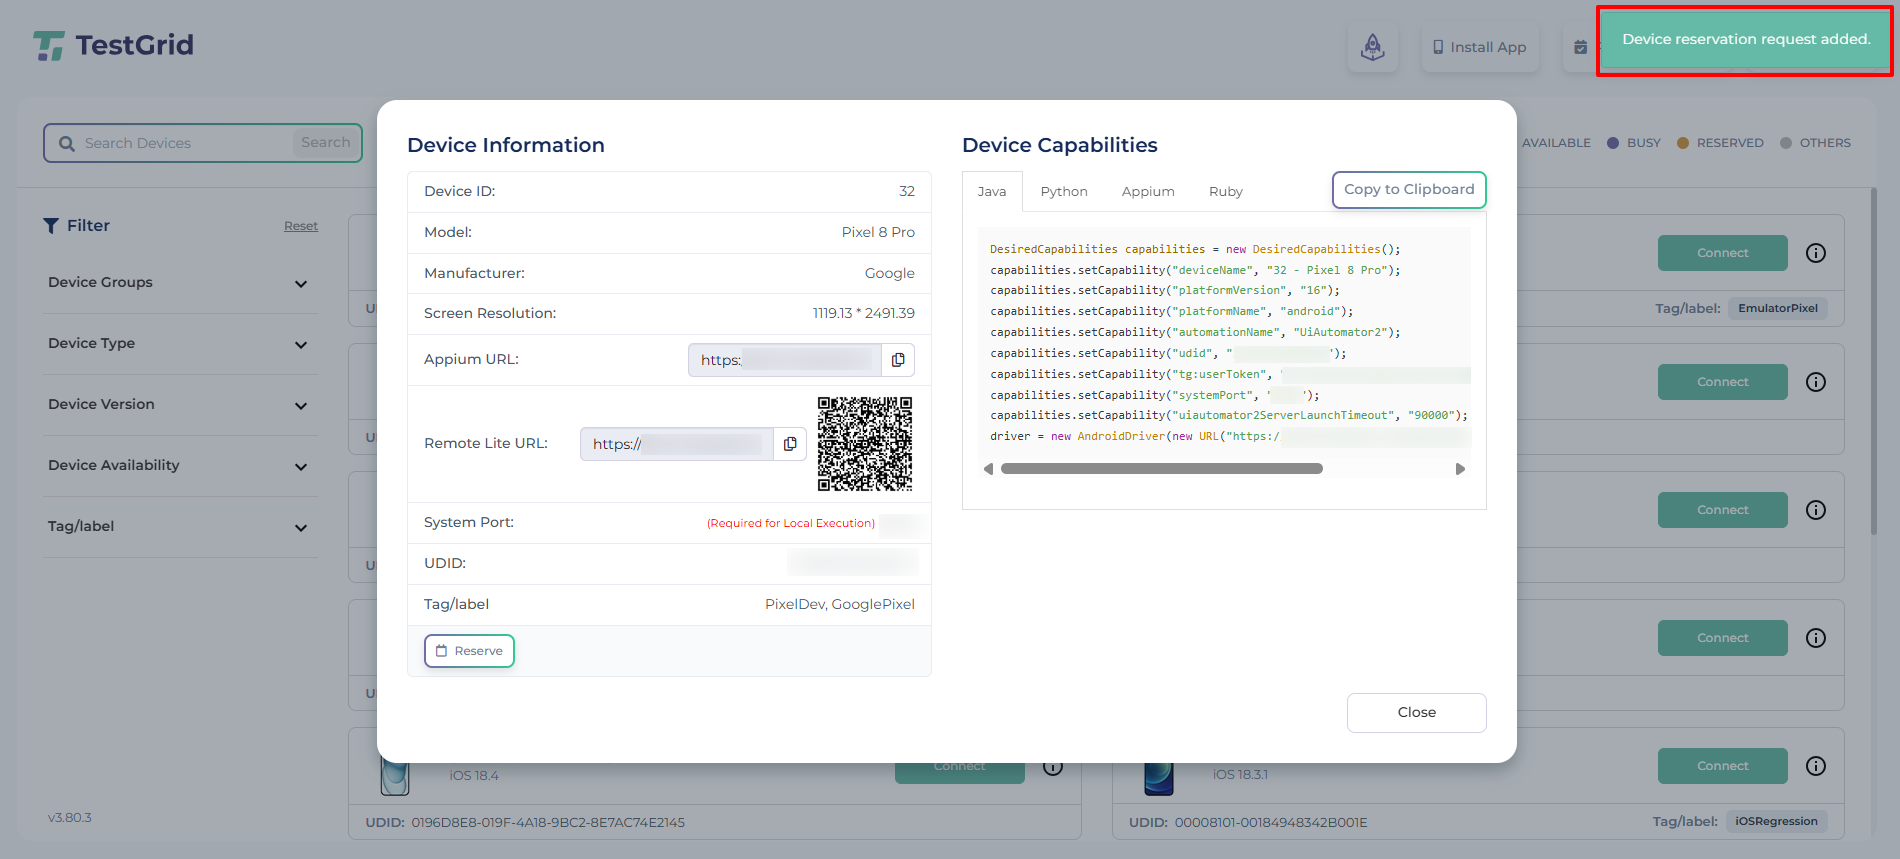
Step 4: A pop-up with the device reservation added will display at the top, as shown in the figure below.
Step 5: Once a device is reserved, an email will be sent to all other users informing them that the device has been added to their account as well.

Step 6: Once the device is reserved, select Reserved Devices at the top of the screen to view the list of reserved devices.

Step 7: When 15 minutes remain in their reservation period bucket, the user will be given the choice to extend or release.

Step 8: Extend is used when the user requires additional time to complete the test cases. The release function removes the device from the reserved list.

Note: Company/Cloud Admins can assign or revoke device access for any team user. This can be fully managed through the Company/Cloud Admin Panel dashboard.
Happy Testing!!